How to Add Google Analytics to Shopify (Step-By-Step Guide)
Shopify is a great place to create online stores, sell products globally, and make money. It provides all relevant apps—for payment, marketing, shipping, and many others—under one roof. So you can set up an eCommerce store with Shopify easily without any designing knowledge or hiring a developer.
No matter what kind of products you are planning to sell, whether it is a fashion store or an electronics shop, Shopify offers a set of applications and services to fulfill your needs. Build a responsive store, install a theme, connect required apps, and add your products to sell. Promote items on social media channels through built-in apps to boost your sales and profit.
Customers will find your store and visit pages from different sources like organic search queries, social sites, and other referral sources.
Tracking audience will help you to customize your marketing strategies and gain more sales. Find how customers detect your online store, how long they spend on the pages, and what is your conversion rate. Installing Google Analytics on Shopify will help you to identify all these things.
Click here to visit Shopify & build your online store to sell products and make money in 2021
What is Google Analytics?
Google Analytics is free yet a powerful tool to monitor your traffic. It provides real-time statistics of your visitors along with their geographical location, devices they use, your popular pages, organic keywords, and much more. Use your audience’s data to optimize the Shopify store and drive more traffic.
Identifying the target audience and organic keywords will help you to apply a custom approach to product development and sales. Find out which niche products shoppers like to buy in the region and offer them attractive discounts to boost your conversion rate. So you should set up Google Analytics on Shopify to unlock more sales opportunities and grow your business.
Adding Google Analytics Code to Shopify
Let us check how to connect Google Analytics to Shopify in 3 simple steps.
1. Create a Google Analytics account
Open Google Analytics on your browser. I assume you’re already signed in with your Google account.
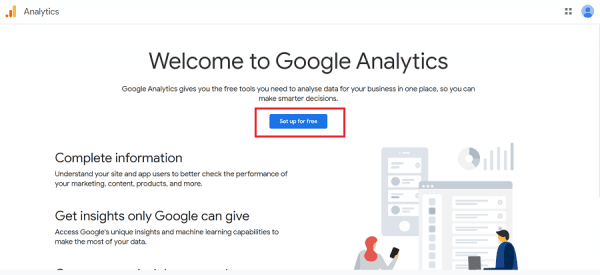
Click the ‘Set up for free’ button to create an Analytics account for your website.
A new screen will open like this,
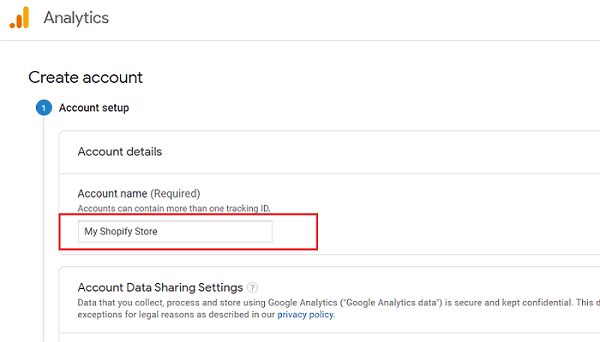
Enter your Shopify store name as the account name.
Click on next. It will bring you to a new screen.
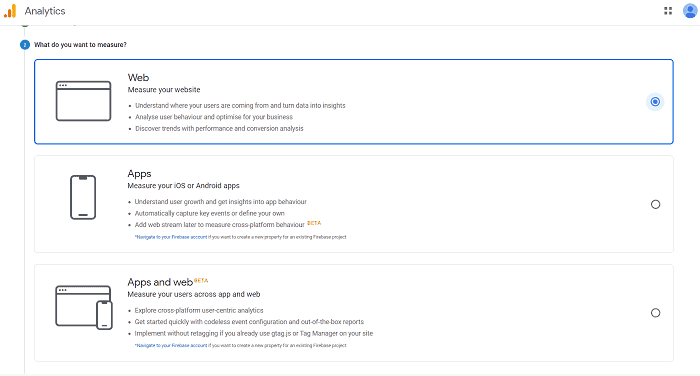
Decide what do you want to measure with Analytics. Web, apps, and both of them. Choose an option and click on next again.

Enter your website name, URL, category, and time zone on the final screen. Click on Create to create an Analytics account for your site.
A pop-up window will appear with Google Analytics policies. Select multiple checkboxes and agree to rules. Now you will see the Google Analytics tracking ID and global site tag on the next screen.
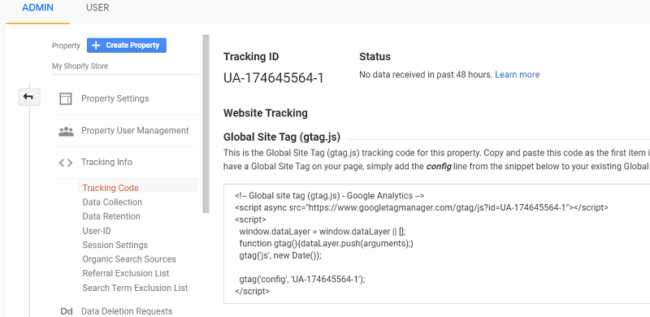
Collect your Global Site Tag tracking code for the Shopify store.
2. Insert your Analytics tracking info on Shopify
Sign in to your Shopify admin. Click Online Store from the left sidebar and select Preferences.

Scroll down to locate the Google Analytics section. Paste the Analytics tracking info that you copied in the last step. Click Save on the bottom.
You have successfully installed Google Analytics on Shopify.
3. Enable Enhanced eCommerce on Google Analytics
Enhanced eCommerce provides valuable insights into the shopping behavior of your visitors. Track your product impressions and clicks, purchases, refunds, and others to improve your online store.
Visit your Analytics account again. Open the Admin menu and locate ‘eCommerce settings’ under the View menu on the right side of your screen.

A new screen will open like this,
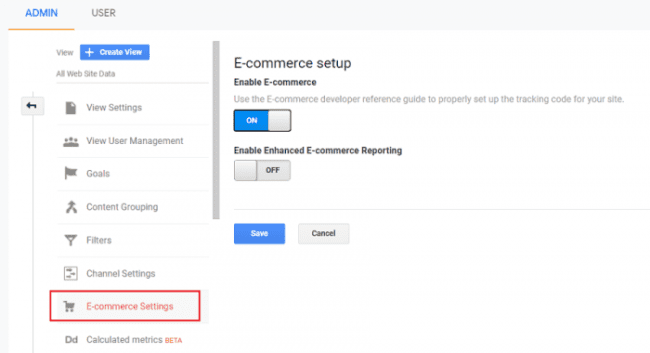
Turn on the Enable E-commerce option. Save changes.
Go back to your Shopify dashboard. Visit Online Store, then Preferences, and locate your Google Analytics section.

Click the ‘Use Enhanced Ecommerce’ checkbox to activate eCommerce tracking on your Shopify store.
That’s it.
Sign in to your Google Analytics dashboard to view real-time statistics of your online store including live visitors, referral sources, product performance, and others.
Read 11 Ways to Take a Screenshot in Windows 11 (+ Browser Extensions)


